Earlier this week, we caved to grocery store pressure and bought a pudding mix. Organic butterscotch. It was delicious, so much so that my husband steeled down to the kitchen unbeknownst to me to finish it off. I was sad.
The next night, we mourned the early demise of said pudding (I glared at my husband a bit) and also the lack of eggs in the house. (Since no eggs usually means no tasty baked goods. We also don't have applesauce on hand.) We were almost certain that our collective sweet tooth would go unquenched. But then, I cracked open my More With Less cookbook. (If you don't already know about this cook book, I strongly suggest you find a copy to borrow. It is amazing. It is a go-to resource for recipes when you are short an ingredient or two, and substitutions. My mom gifted me an updated version because I used her so much!)
In this gem of a cooking reference, I found a very simple chocolate pudding recipe. It called for sugar, corn starch, cocoa, milk, vanilla, and margarine. I had everything in my kitchen already. (Well, I had butter, not margarine.) My husband was a bit surprised to learn we had corn starch in our cupboards, but I wasn't! (I did buy it, after all.)
One feature of the More With Less book is that they include hints, additions, and variations that other cooks have used with success. For this pudding recipe, one suggestion was to replace the few tablespoons of margarine with a quarter cup of peanut butter. Usually, I like to make a recipe at least once by the 'book' before I start in with the alterations, but we could not pass up the chocolate and peanut butter combination.
The pudding thickened up beautifully. I almost didn't want to add the vanilla and peanut butter, but I did. And I should have used a whisk to blend in the peanut butter and not just my wooden spoon. Or added it a bit sooner. The peanut butter didn't incorporate a smoothly as it could have, so the pudding was a bit lumpy, but still quite tasty. Neither my husband nor I had any complaints.
The recipe yield was four servings, so we halved it, putting half in the fridge. With our track record, if we hadn't put half away immediately, we could have demolished the whole batch in one go.
A bit of an aside, to explain how much I love More With Less, I'd say this: If I could only have one cookbook for the rest of my life, it would be a toss up between More with Less and my older version of Joy of Cooking. I'd probably try to find book binder to combine the two into one, super cooking resource.
Showing posts with label cooking. Show all posts
Showing posts with label cooking. Show all posts
Thursday, January 13, 2011


Monday, December 13, 2010
*Drip... Drip... Drip... The joys of not being able to call a landlord.
As I mentioned in my last post, we hosted our first holiday dinner this past Thanksgiving. Since we were out of town for a work conference the weekend beforehand, this meant we were in a flurry of activity during our post-work hours on the weekdays leading up to the main event. Once we had settled down, and the only things left to do could only be done on the day of, I snuggled on the couch to watch TV. And that is when I heard it. A sound that will strike fear into the hearts of homeowners who are no longer able to call a landlord...
Drips. I heard dripping from the kitchen, so I went into investigate, hoping that it was just the faucet. It was not the faucet. Instead, I was greeted by a slow drip coming from a small crack in the ceiling.
I may or may not have mentioned this, but our kitchen is very dated: textured wallpaper, possibly-original-to-the-house stove, and carpeted floors. Lucky for us (?!), the leak was not heavy at that point, so I set down a bowl, and got out the wet vac. Upon discovering how wide the wet spot on the carpet was, I was surprised we had not noticed it when we first got home. The wet spot was probably a 1.5 - 2 ft diameter circle.
My husband and I had two moments of panic: 1) there's a leak in our roof, and it is supposed to rain the entire holiday weekend, and (2) we are supposed to be cooking a lot of food and hosting our first holiday dinner!
From our various improvement projects, we do have a smattering of tools. My husband got the dry wall saw, and started cutting around the wet area, so we could try to get a look at the leak. (This section of the roof area is inaccessible via an attic space. The leak makes me think that when we redo the kitchen, putting in a pull-down-attic-ladder would be a good idea, even if those things give me the heebie-jeebies.)
Wednesday evening ended up being full of cutting and clearing the ceiling, dealing with the spray insulation, and finding the leak! While having a leak in your roof is not a very happy thing, finding said leak within 24-hours is. We are relatively lucky in that the water was coming in directly above where it was leaking through the ceiling. No hunting for the water's path or obscure leak location. Turns out that there was a knot in the roof board. Knot - as in an actual hole. And there was a roofing nail through said knot. Water was just dripping in along the nail.
As it was Thanksgiving Day Eve, we knew that we would not be able to do much other than prevent the carpet from getting soaked. We (my husband, rather) put a bowl on the rafters underneath the leak, and used painter's tape and a bag to cover the hole in our ceiling. Classy, I know. ;)
We did check on the collection bowl regularly, and it seemed to do the trick, at least for the time being. The holiday dinner went well, and no one was drenched by roof water. Friday after Thanksgiving, my husband had to work, and went to a hardware store to see what we could do about the leak until we can replace the entire roof (a project we knew we would have to do in the future - this just brings the project into the more immediate future). Less than $10 for some roofing cement and supplies (plus much more for a ladder we needed anyway), and the leak is patched (and holding up against the recent snow).
Now we get to research our roofing options! Do you have any particular favorites?
Drips. I heard dripping from the kitchen, so I went into investigate, hoping that it was just the faucet. It was not the faucet. Instead, I was greeted by a slow drip coming from a small crack in the ceiling.
I may or may not have mentioned this, but our kitchen is very dated: textured wallpaper, possibly-original-to-the-house stove, and carpeted floors. Lucky for us (?!), the leak was not heavy at that point, so I set down a bowl, and got out the wet vac. Upon discovering how wide the wet spot on the carpet was, I was surprised we had not noticed it when we first got home. The wet spot was probably a 1.5 - 2 ft diameter circle.
My husband and I had two moments of panic: 1) there's a leak in our roof, and it is supposed to rain the entire holiday weekend, and (2) we are supposed to be cooking a lot of food and hosting our first holiday dinner!
From our various improvement projects, we do have a smattering of tools. My husband got the dry wall saw, and started cutting around the wet area, so we could try to get a look at the leak. (This section of the roof area is inaccessible via an attic space. The leak makes me think that when we redo the kitchen, putting in a pull-down-attic-ladder would be a good idea, even if those things give me the heebie-jeebies.)
Wednesday evening ended up being full of cutting and clearing the ceiling, dealing with the spray insulation, and finding the leak! While having a leak in your roof is not a very happy thing, finding said leak within 24-hours is. We are relatively lucky in that the water was coming in directly above where it was leaking through the ceiling. No hunting for the water's path or obscure leak location. Turns out that there was a knot in the roof board. Knot - as in an actual hole. And there was a roofing nail through said knot. Water was just dripping in along the nail.
As it was Thanksgiving Day Eve, we knew that we would not be able to do much other than prevent the carpet from getting soaked. We (my husband, rather) put a bowl on the rafters underneath the leak, and used painter's tape and a bag to cover the hole in our ceiling. Classy, I know. ;)
We did check on the collection bowl regularly, and it seemed to do the trick, at least for the time being. The holiday dinner went well, and no one was drenched by roof water. Friday after Thanksgiving, my husband had to work, and went to a hardware store to see what we could do about the leak until we can replace the entire roof (a project we knew we would have to do in the future - this just brings the project into the more immediate future). Less than $10 for some roofing cement and supplies (plus much more for a ladder we needed anyway), and the leak is patched (and holding up against the recent snow).
Now we get to research our roofing options! Do you have any particular favorites?
Tuesday, March 23, 2010
Revolution and School Lunch, part 2
Thinking a bit about what I posted yesterday, I started reminiscing about my own school lunch experiences. I went to public school K-12, so I was right there, in the same sort of situation that Jamie finds himself in his show. I'd like to think that things were better way back when, but in all honesty, "way back when" for me isn't all that long ago.
In elementary school, I made my lunch to take to school, everyday. School lunch menus were printed up a month in advance, and handed out. I was allowed to buy lunch at school one day a week, as a treat (the thrill of the purchase? or not having to make my own sandwich, I guess). I don't remember much about lunch during middle school, other than the layout, and the treacherous landscape that was difficult to navigate with a growing body and backpack. In high school, I was given more autonomy when it came to lunch. If I had money, and wanted to buy my lunch, I could. Or I could take it. I'm guessing that I took my lunch more than I bought it. But, I still bought the crap. I bought pizza because pizza wasn't something we had at home.
If I went through the regular lunch line, I did usually get at least one fruit or veggie, but do remember that a lot of offerings were breaded and/or fried. That is just what the choices were. Salads were more expensive, and had cheese on them, plus the salad dressing choices were basically Ranch, Ranch, electric colored French, or Ranch.
Have I mentioned here that I don't like Ranch dressing? The spice rub, sure, but for some reason, once they are combined with sour cream or mayonnaise, it makes me a bit nauseous.
And, here is a blog by a teacher who is eating the school lunch every day this calendar year. She supplements with other information posts. It is quite interesting to read. She takes a picture of her lunch daily, and I've been shocked by the amount of plastic and pre-packaging school lunch has now. I remember getting corn dished out from a large, stainless steel container, directly onto my plastic tray. Also, I'm a bit surprised at the lack of utensils. I shouldn't be though. When I started public school, we still had metal utensils. By the time I had graduated, we were down to plastic, and I think that the knife was being phased out as too dangerous.
What about you? What was your school lunch situation? If you saw the program on Sunday night, how does your school lunch experience compare to what the show portrayed?
In elementary school, I made my lunch to take to school, everyday. School lunch menus were printed up a month in advance, and handed out. I was allowed to buy lunch at school one day a week, as a treat (the thrill of the purchase? or not having to make my own sandwich, I guess). I don't remember much about lunch during middle school, other than the layout, and the treacherous landscape that was difficult to navigate with a growing body and backpack. In high school, I was given more autonomy when it came to lunch. If I had money, and wanted to buy my lunch, I could. Or I could take it. I'm guessing that I took my lunch more than I bought it. But, I still bought the crap. I bought pizza because pizza wasn't something we had at home.
If I went through the regular lunch line, I did usually get at least one fruit or veggie, but do remember that a lot of offerings were breaded and/or fried. That is just what the choices were. Salads were more expensive, and had cheese on them, plus the salad dressing choices were basically Ranch, Ranch, electric colored French, or Ranch.
Have I mentioned here that I don't like Ranch dressing? The spice rub, sure, but for some reason, once they are combined with sour cream or mayonnaise, it makes me a bit nauseous.
And, here is a blog by a teacher who is eating the school lunch every day this calendar year. She supplements with other information posts. It is quite interesting to read. She takes a picture of her lunch daily, and I've been shocked by the amount of plastic and pre-packaging school lunch has now. I remember getting corn dished out from a large, stainless steel container, directly onto my plastic tray. Also, I'm a bit surprised at the lack of utensils. I shouldn't be though. When I started public school, we still had metal utensils. By the time I had graduated, we were down to plastic, and I think that the knife was being phased out as too dangerous.
What about you? What was your school lunch situation? If you saw the program on Sunday night, how does your school lunch experience compare to what the show portrayed?
Monday, March 22, 2010
Jamie Oliver's Revolution
Did any of you watch the sneak preview of Jamie Oliver's Food Revolution last night? I did. You may know Jamie from his series on the Food Network, The Naked Chef.
The premise of the show/series is confronting current eating habits and food trends. He went to Huntington, WV, which was declared the unhealthiest city in America by a recent USDA study (here's an msnbc article about it) to see what, if anything, he could do about it.
A thread in Jamie's cooking and projects is stripping food down to basics. Getting to know the basic, raw ingredients, so that you can make good food, from the foundation up.
The one-hour sneak preview focuses on school lunched (and breakfast). He met varying amounts of resistance from the community, administrators and the lunch ladies themselves. It seemed to me that he was going out of his way to explain himself and not step on the toes of the administration. He encountered tons of red-tape when he was trying to put together a menu. He was misrepresented in the media, which didn't help his credibility at all.
He did spend a bit of time harping on the ingredients in the food being served the elementary school children. As an obsessive label-reader now, I get it. And I'm right there with him. One of the cooks kept pointing out that the first ingredient listed was chicken or beef, or whatever the product claimed to be. (That is cool - but what got me was the fact that half of a side of the box was taken up with the rest of the ingredient list - some very scary, hard-to-pronounce stuff. I remember my mom telling me that if I couldn't pronounce it, I shouldn't eat it. She is a smart lady. I really should have listened more growing up, huh?)
His entire 3+ month long experience in Huntington wasn't shown in the one-hour long program, or else it would not have been a teaser, sneak preview! In good TV form, he's facing a problem, and questioning his ability to conquer it. While I suspect they wouldn't have bothered airing the pilot if it didn't succeed to some extent, I am anxious to see what happens next.
He did this sort of thing in England, already. So, he's not trying to pick on us Americans or anything. (Really, though, if you see the example of what that one family eats in a week, or what the children are actually eating from their lunch, and you don't think that something is at least a bit off, well, then, you and I will just have to agree to disagree, and move on. Also, I suggest you just click through the rest of this blog. I'm trying to combat my own food laziness, cook more, cook better, and eat a greater variety of good-for-me foods. That is sort of what is going on here.)
So, did you see the show? What are your thoughts on it?
The premise of the show/series is confronting current eating habits and food trends. He went to Huntington, WV, which was declared the unhealthiest city in America by a recent USDA study (here's an msnbc article about it) to see what, if anything, he could do about it.
A thread in Jamie's cooking and projects is stripping food down to basics. Getting to know the basic, raw ingredients, so that you can make good food, from the foundation up.
The one-hour sneak preview focuses on school lunched (and breakfast). He met varying amounts of resistance from the community, administrators and the lunch ladies themselves. It seemed to me that he was going out of his way to explain himself and not step on the toes of the administration. He encountered tons of red-tape when he was trying to put together a menu. He was misrepresented in the media, which didn't help his credibility at all.
He did spend a bit of time harping on the ingredients in the food being served the elementary school children. As an obsessive label-reader now, I get it. And I'm right there with him. One of the cooks kept pointing out that the first ingredient listed was chicken or beef, or whatever the product claimed to be. (That is cool - but what got me was the fact that half of a side of the box was taken up with the rest of the ingredient list - some very scary, hard-to-pronounce stuff. I remember my mom telling me that if I couldn't pronounce it, I shouldn't eat it. She is a smart lady. I really should have listened more growing up, huh?)
His entire 3+ month long experience in Huntington wasn't shown in the one-hour long program, or else it would not have been a teaser, sneak preview! In good TV form, he's facing a problem, and questioning his ability to conquer it. While I suspect they wouldn't have bothered airing the pilot if it didn't succeed to some extent, I am anxious to see what happens next.
He did this sort of thing in England, already. So, he's not trying to pick on us Americans or anything. (Really, though, if you see the example of what that one family eats in a week, or what the children are actually eating from their lunch, and you don't think that something is at least a bit off, well, then, you and I will just have to agree to disagree, and move on. Also, I suggest you just click through the rest of this blog. I'm trying to combat my own food laziness, cook more, cook better, and eat a greater variety of good-for-me foods. That is sort of what is going on here.)
So, did you see the show? What are your thoughts on it?
Friday, February 19, 2010
We've been jammin'
I have memories of my mom making blueberry jam every summer from Michigan blueberries, bought while we were up at her family's cabin in the northern Lower Peninsula. [By cabin, I mean 4 room, plus pseudo-indoor bathroom, NON-winterized, former hunting cabin. It had been the first man-made structure on the lake, with few updates...]
I never helped. I never had the inclination to help or learn. Boy, am I kicking myself now!
Last winter, the desire to can or preserve produce started to really knock around my head. I researched a bit about it, but was overwhelmed with what needed to be done, and initial supply investment. Then, the husband and I visited some of his extended family in northeastern Tennessee. One morning for breakfast, he was insistent that I try his great aunt's strawberry freezer jam.
Wow. Let me tell you - it was like summer sunshine on a biscuit. I was amazed, and immediately asked her how she made it. She was adamant that it was easy, and gave me the run down.
Turns out, freezer jam is wonderful, tasty, and easy. It pretty much takes: fruit, sugar, water, and pectin. Since my husband's (great) aunt uses the yellow Sure-Jell pectin, that is what I have used. I'm not sure that there are differences in brands of pectin; I just wasn't about to try a recipe for the first time and wildly vary the ingredients.
Once you have the ingredients, you simply follow the directions that come with the box, taking care that you follow the Freezer Jam directions.
What takes the most time is preparing your fruit, and letting the jam set in the jars overnight. Here are a couple of things about the recipe I've learned:
- the first time I tried it, I mashed the fruit and had fruit pieces left. That batch did not set up well, and was not like his (great) aunt's at all. The taste was fine, but the texture wasn't quite there. The second time (and third, and all subsequent ones), I did run the strawberries through the blender, and got what was pretty much a puree. It set up beautifully. So... I recommend running the fruit through a blender or food processor. At least strawberries; at least for freezer jam.
- the recipe to which I linked says to use plastic containers. You can, but you can also use the regular glass canning jars.
I loved that I learned how to make this. Now, I can have that summer taste anytime, knowing that I made it. Plus, it is a great way to use fruit that is about to turn. Once, when I was in the grocery store, I noticed a big bag of strawberries and a smaller one of blackberries on sale (serious sale) because they were about to turn. I looked it over, saw that there was some unusable fruit, but that there'd be enough for a batch of jam, so I bought both bags. If I had not had a way to use or preserve that fruit immediately, I would not have been able to take advantage of the price reduction. I remember feeling a little thrill. And it lead to the strawberry-blackberry freezer jam experiment.
I made freezer jam several times last spring, and ended up giving away quite a few jars just before we moved from NC to IN. Aside from the strawberry-blackberry jar currently open in our fridge, I only have one jar of strawberry left in my freezer. I cannot wait for spring harvests! What about you?
I never helped. I never had the inclination to help or learn. Boy, am I kicking myself now!
Last winter, the desire to can or preserve produce started to really knock around my head. I researched a bit about it, but was overwhelmed with what needed to be done, and initial supply investment. Then, the husband and I visited some of his extended family in northeastern Tennessee. One morning for breakfast, he was insistent that I try his great aunt's strawberry freezer jam.
Wow. Let me tell you - it was like summer sunshine on a biscuit. I was amazed, and immediately asked her how she made it. She was adamant that it was easy, and gave me the run down.
Turns out, freezer jam is wonderful, tasty, and easy. It pretty much takes: fruit, sugar, water, and pectin. Since my husband's (great) aunt uses the yellow Sure-Jell pectin, that is what I have used. I'm not sure that there are differences in brands of pectin; I just wasn't about to try a recipe for the first time and wildly vary the ingredients.
Once you have the ingredients, you simply follow the directions that come with the box, taking care that you follow the Freezer Jam directions.
What takes the most time is preparing your fruit, and letting the jam set in the jars overnight. Here are a couple of things about the recipe I've learned:
- the first time I tried it, I mashed the fruit and had fruit pieces left. That batch did not set up well, and was not like his (great) aunt's at all. The taste was fine, but the texture wasn't quite there. The second time (and third, and all subsequent ones), I did run the strawberries through the blender, and got what was pretty much a puree. It set up beautifully. So... I recommend running the fruit through a blender or food processor. At least strawberries; at least for freezer jam.
- the recipe to which I linked says to use plastic containers. You can, but you can also use the regular glass canning jars.
I loved that I learned how to make this. Now, I can have that summer taste anytime, knowing that I made it. Plus, it is a great way to use fruit that is about to turn. Once, when I was in the grocery store, I noticed a big bag of strawberries and a smaller one of blackberries on sale (serious sale) because they were about to turn. I looked it over, saw that there was some unusable fruit, but that there'd be enough for a batch of jam, so I bought both bags. If I had not had a way to use or preserve that fruit immediately, I would not have been able to take advantage of the price reduction. I remember feeling a little thrill. And it lead to the strawberry-blackberry freezer jam experiment.
I made freezer jam several times last spring, and ended up giving away quite a few jars just before we moved from NC to IN. Aside from the strawberry-blackberry jar currently open in our fridge, I only have one jar of strawberry left in my freezer. I cannot wait for spring harvests! What about you?
Thursday, February 18, 2010
Recipe Thursday: Chicken Soup
Soup is wonderful on a cold winter's day. So warm and comforting.
Here's my first try at chicken soup:
Last weekend, after I made the chicken stock, and was dividing it all up for storage, I had some stock leftover that didn't fit in the containers. It was about a cup or two of stock. I set that back on the burner, and added about 2 cups of water.
Then, I chopped up 1 carrot and half an onion and added it to the pot. I used about a cup of chicken, and roughly chopped it up, adding it to the pot.
This is a good point to add spices, if you like. I used salt, pepper, and a bit of garlic powder. A bay leaf would have been nice, too, but it slipped my mind. This is also the time to add any extra liquid, if it doesn't look like there is enough.
I brought everything to a boil for a few minutes, then reduced the heat to a simmer. I didn't set a timer or anything, so just checked on it regularly. When the veggies were soft, I knew it was ready. It yielded a bit over 4 bowls of soup.
I was excited, because this time, the stock wasn't as bland as I've made it before. The soup was yummy, too, and here's a picture of it. I took it to work for lunch; it was wonderful with some of my biscuits. In the picture, you may notice that the tell tale signs of some fat in the stock. You can always regulate the amount of fat in your stock and soup by skimming more or less off as it simmers. Personally, I do think that a little bit of fat is a good thing, necessary even. Moderation, in everything, being key. Now, if only I could moderate my chocolate and ice cream intake...
How about you; do you enjoy a steaming bowl of soup when it is snowing outside? Do you have any tried and true recipes that you enjoy?
Here's my first try at chicken soup:
Last weekend, after I made the chicken stock, and was dividing it all up for storage, I had some stock leftover that didn't fit in the containers. It was about a cup or two of stock. I set that back on the burner, and added about 2 cups of water.
Then, I chopped up 1 carrot and half an onion and added it to the pot. I used about a cup of chicken, and roughly chopped it up, adding it to the pot.
This is a good point to add spices, if you like. I used salt, pepper, and a bit of garlic powder. A bay leaf would have been nice, too, but it slipped my mind. This is also the time to add any extra liquid, if it doesn't look like there is enough.
I brought everything to a boil for a few minutes, then reduced the heat to a simmer. I didn't set a timer or anything, so just checked on it regularly. When the veggies were soft, I knew it was ready. It yielded a bit over 4 bowls of soup.
I was excited, because this time, the stock wasn't as bland as I've made it before. The soup was yummy, too, and here's a picture of it. I took it to work for lunch; it was wonderful with some of my biscuits. In the picture, you may notice that the tell tale signs of some fat in the stock. You can always regulate the amount of fat in your stock and soup by skimming more or less off as it simmers. Personally, I do think that a little bit of fat is a good thing, necessary even. Moderation, in everything, being key. Now, if only I could moderate my chocolate and ice cream intake...

How about you; do you enjoy a steaming bowl of soup when it is snowing outside? Do you have any tried and true recipes that you enjoy?
Wednesday, February 10, 2010
Taking Stock, part deux
I hope you enjoy the titles of my posts as much as I do. They are chosen because they make me smirk; really hope you get a smile or two out of this blog.
On to the chicken carcass that was chillin' in my fridge on Saturday.
There are actual stock recipes. If you google stock, or check out your favorite how-to cookbook (mine being my old Joy of Cooking), you are bound to find several. They usually call for vegetable scraps or fresh veggies or a bouquet garni of some sort to help flavor the stock. They'll call for a specific amount of bone/carcass to water/veggies. The first time I attempted stock, I found this very helpful. But here's the thing, people have been drawing nutrients for stock for a long time, and did so without recipes.
Basically, what I've taken from the recipes is :
- older chickens tend to have more flavor
- the carcass needs to be completely covered (with usually an inch or so to spare) with water
- veggies can be used to flavor
- you do need to bring it to a boil
- you need to simmer for at least an hour or two
- lid should be set on the pot, slightly ajar, for majority of simmering time
- and skimming the scum is very helpful.
What this means is that my process for stock making is generally:
- place carcass in stock and cover with water
- set to boil
- let boil for a while, check on it
- reduce heat to simmer
- set lid on pot, slightly ajar
- check on it
- go away, read a book, watch some tv
- check on it
- skim the stock
- repeat
When the liquid has reduced (and if I don't feel like adding more), and has gained a color resembling stock, I remove it from the stove. Then, I take out the bones (and anything that was added, like onion or bouquet garni), and divide the stock amongst my storage containers. Washed pasta sauce jars work very nicely. Let it all cool on the counter, and then stick in your fridge. Be sure to rotate any stock still in your fridge to the "top," or where ever you will be able to use it before the new stock.
Because I generally don't add veggies to my stock as it simmers (because I don't often have them on hand), in all honesty, my stock is rather bland. I can see the fat in it, though, and it is more flavorful than plain water.
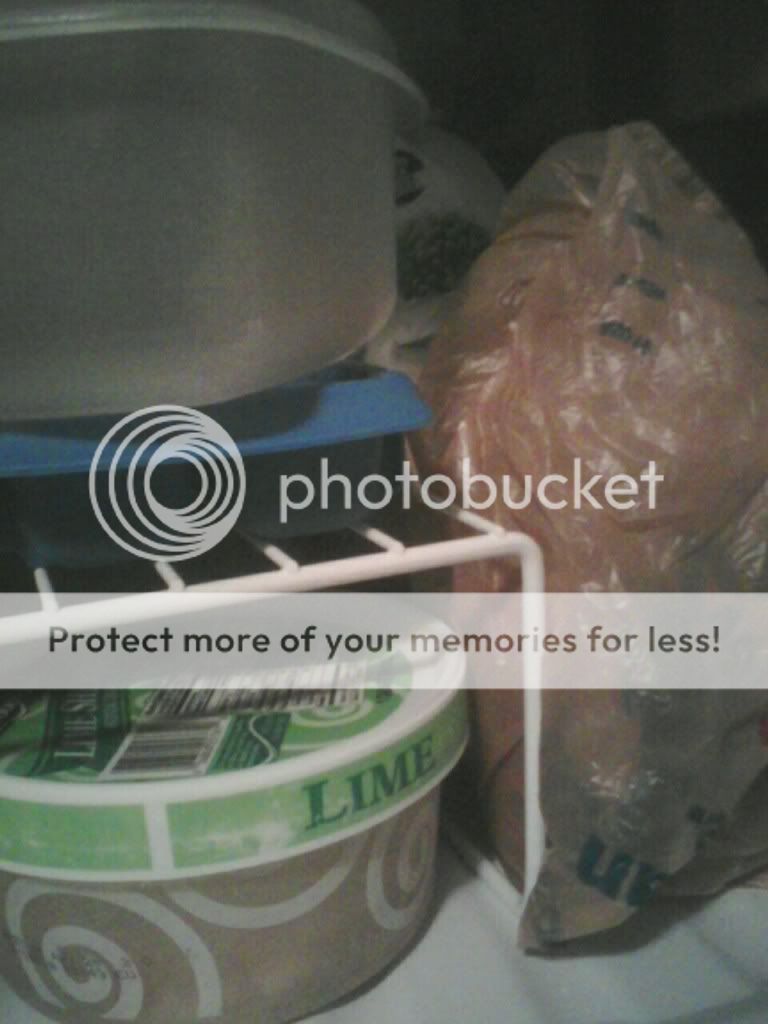
In case you are curious at all, here are some photos of my freezer:
1. See the tower of stock containers, a bag of frozen veggies, and to the right, the larger containers of soup
2. The plastic bag is wrapped around an old pasta sauce jar of new stock, as a precaution, in reality, this is sitting in front of the tower of stock. The lime sherbert container is actually soup. You can also see my ice trays and DIY ice bucket.
Making your own stock is a relatively easy process that requires very little attention on your part, once the pot is simmering. Have you made your own stock before? Do you do it on a regular basis? If so, do you follow a recipe or add flavoring to it? If not, feel like giving it a go?
On to the chicken carcass that was chillin' in my fridge on Saturday.
There are actual stock recipes. If you google stock, or check out your favorite how-to cookbook (mine being my old Joy of Cooking), you are bound to find several. They usually call for vegetable scraps or fresh veggies or a bouquet garni of some sort to help flavor the stock. They'll call for a specific amount of bone/carcass to water/veggies. The first time I attempted stock, I found this very helpful. But here's the thing, people have been drawing nutrients for stock for a long time, and did so without recipes.
Basically, what I've taken from the recipes is :
- older chickens tend to have more flavor
- the carcass needs to be completely covered (with usually an inch or so to spare) with water
- veggies can be used to flavor
- you do need to bring it to a boil
- you need to simmer for at least an hour or two
- lid should be set on the pot, slightly ajar, for majority of simmering time
- and skimming the scum is very helpful.
What this means is that my process for stock making is generally:
- place carcass in stock and cover with water
- set to boil
- let boil for a while, check on it
- reduce heat to simmer
- set lid on pot, slightly ajar
- check on it
- go away, read a book, watch some tv
- check on it
- skim the stock
- repeat
When the liquid has reduced (and if I don't feel like adding more), and has gained a color resembling stock, I remove it from the stove. Then, I take out the bones (and anything that was added, like onion or bouquet garni), and divide the stock amongst my storage containers. Washed pasta sauce jars work very nicely. Let it all cool on the counter, and then stick in your fridge. Be sure to rotate any stock still in your fridge to the "top," or where ever you will be able to use it before the new stock.
Because I generally don't add veggies to my stock as it simmers (because I don't often have them on hand), in all honesty, my stock is rather bland. I can see the fat in it, though, and it is more flavorful than plain water.
In case you are curious at all, here are some photos of my freezer:
1. See the tower of stock containers, a bag of frozen veggies, and to the right, the larger containers of soup

2. The plastic bag is wrapped around an old pasta sauce jar of new stock, as a precaution, in reality, this is sitting in front of the tower of stock. The lime sherbert container is actually soup. You can also see my ice trays and DIY ice bucket.
Making your own stock is a relatively easy process that requires very little attention on your part, once the pot is simmering. Have you made your own stock before? Do you do it on a regular basis? If so, do you follow a recipe or add flavoring to it? If not, feel like giving it a go?
Tuesday, February 9, 2010
Taking stock (and giblets, necks, and carcasses)
So that chicken whose giblets I decided I didn't like, what did I do with it?
Here's the run down. Bought the whole chicken on Friday, and baked it that night. (350 degrees Fahrenheit, for 20 minutes a pound, uncovered, on a wire rack in a shallow baking pan. Or until a meat thermometer stuck in the thigh reads 180.)
**Here's an aside about the chicken. I could have bought one of those pre-roasted chickens from the store, and saved myself some time, while still having a bunch of meat and the carcass to use. Why didn't I? Because those are about 2 pound birds, and I paid 56 cents less for a bird that was roughly 4.7 pound. Plus, I got the giblets and neck in addition to the meat and carcass. The pre-roasted chickens aren't a bad deal overall, but if you have the time to spare, cooking a whole chicken yourself is usually more cost-effective.**
As the chicken was in the oven, that is when I started the failed giblet recipe and also set the neck to boiling.
Did you just do a double take? Yeah, well, I took my medium sized sauce pan, filled about half way with water, plunked the neck into it, plus the last quarter of an onion I had laying around. Brought it all to a boil, then reduced to a simmer, and let it alone. I did poke my head over every so often to skim off the scum/fat/foam that forms. I don't remember how long I ended up letting it simmer, but it was probably at least 1.5 to 2 hours. At this point, I discarded the onion and neck, and poured the liquid into a jar.
Yes, a jar. I am running out of inherited and re-purposed plastic storage containers (they are all in my freezer!). I've used the jars to make freezer jam, so they hold up in the freezer, and contain a known quantity (now, if only I could remember what that was). You can see the jar of neck stock here, sort of, along with a beef chuck roast that my aunt gave us, some nuts, and other random stuff on my freezer door.
After the chicken cooled, I carved it up, as best I could. This is not a skill at which I excel. I tried to slice the breasts thin enough for sandwiches, and disjointed the legs and wings. I was quite pleased with the result, because the chicken was tender, sliding right off of the thigh bone. Aside from the bone-in wings and legs, and the sliced breast, everything else was just sort of peeled and pulled off, and stored together.
I put the carcass in my big soup pot, covered it, and stuck it in the fridge. This was all done Friday after I got home from work, mind you. It was getting late, and I wanted to read, spend time with my husband, and oh yeah, sleep! The carcass would keep for a day.
So will the actual stock-taking.
Here's the run down. Bought the whole chicken on Friday, and baked it that night. (350 degrees Fahrenheit, for 20 minutes a pound, uncovered, on a wire rack in a shallow baking pan. Or until a meat thermometer stuck in the thigh reads 180.)
**Here's an aside about the chicken. I could have bought one of those pre-roasted chickens from the store, and saved myself some time, while still having a bunch of meat and the carcass to use. Why didn't I? Because those are about 2 pound birds, and I paid 56 cents less for a bird that was roughly 4.7 pound. Plus, I got the giblets and neck in addition to the meat and carcass. The pre-roasted chickens aren't a bad deal overall, but if you have the time to spare, cooking a whole chicken yourself is usually more cost-effective.**
As the chicken was in the oven, that is when I started the failed giblet recipe and also set the neck to boiling.
Did you just do a double take? Yeah, well, I took my medium sized sauce pan, filled about half way with water, plunked the neck into it, plus the last quarter of an onion I had laying around. Brought it all to a boil, then reduced to a simmer, and let it alone. I did poke my head over every so often to skim off the scum/fat/foam that forms. I don't remember how long I ended up letting it simmer, but it was probably at least 1.5 to 2 hours. At this point, I discarded the onion and neck, and poured the liquid into a jar.
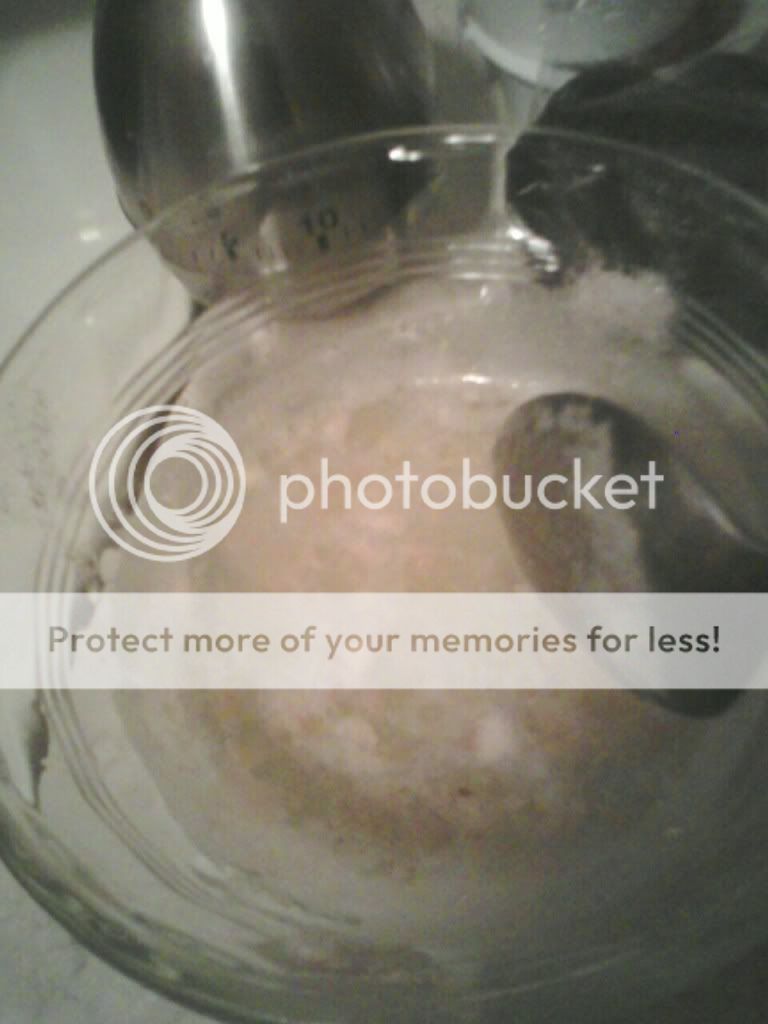
Yes, a jar. I am running out of inherited and re-purposed plastic storage containers (they are all in my freezer!). I've used the jars to make freezer jam, so they hold up in the freezer, and contain a known quantity (now, if only I could remember what that was). You can see the jar of neck stock here, sort of, along with a beef chuck roast that my aunt gave us, some nuts, and other random stuff on my freezer door.

After the chicken cooled, I carved it up, as best I could. This is not a skill at which I excel. I tried to slice the breasts thin enough for sandwiches, and disjointed the legs and wings. I was quite pleased with the result, because the chicken was tender, sliding right off of the thigh bone. Aside from the bone-in wings and legs, and the sliced breast, everything else was just sort of peeled and pulled off, and stored together.
I put the carcass in my big soup pot, covered it, and stuck it in the fridge. This was all done Friday after I got home from work, mind you. It was getting late, and I wanted to read, spend time with my husband, and oh yeah, sleep! The carcass would keep for a day.
So will the actual stock-taking.
Monday, February 8, 2010
Food Waste Challenge, Week 1
I didn't officially sign up for Crunchy Chicken's Food Waste Reduction Challenge, but have decided to participate, unofficially. Because, participating unofficially might mean I won't feel so bad when I end up throwing away food.
So, from my spotty memory, my tally is as follows:
- one baked chicken skin
- one failed recipe involving said chicken's giblets in a gravy (1.5 tbsp of butter, 1-2 cups of water, a quarter of an onion and about 2.5 tbsp of flour)
- total of about half an onion boiled for various stocks, then tossed
I'm sure that there had to be more, but that is what I can remember. And it was all from this weekend.
Speaking of giblets in gravy: this was my first attempt at it, and I was following a recipe from my Joy of Cooking. Usually, I find these recipes to be fool-proof, and good guides. As always, I didn't quite follow it, though, because I didn't have everything the recipe wanted. What I did was:
- Bring water to a boil, add diced giblets, reduce to a simmer for an hour, or until tender. I added a quarter of left over onion I had.
- After an hour, remove/drain giblets (and onion). Reserve giblets (not the onion).
- Make gravy with about 1 cup of reserved stock, about 2 tbsp of butter and 2 tbsp of flour.
- At this point, I proceeded like one does when making sausage gravy - whisking out lumps and such.
- Add giblets (and the veggies it called for in the real recipe).
- Serve on toast.
I tried it straight from a spoon. Added salt and pepper to taste. Tried it on a leftover biscuit. Decided that I had added too much flour, and that the gravy was dangerously close to glue. That and I didn't think that either husband and I would eat it. Especially not with fresh chicken, and other, better leftovers ready to be consumed.
I decided against saving it to be doctored up at a later date because, as close as it was to glue then, I was sure that it would become a solid after any amount of time in the fridge. So... Bye-bye, giblets.
In case you are curious, here's a fuzzy picture of a diced giblet in gravy. If you step back and squint, that'll probably help.

Next time, I think I'll stick with simply making my own stock from the giblets.
What have you done with chicken or turkey giblets? Or necks?
And, how are you doing with the Food Waste Reduction Challenge at your house?
Thursday, February 4, 2010
Recipe Thursday: Quick Cabbage
Alright, from here on out, every Thursday, I'll post some sort of recipe that meets most, if not all, the following criteria: simple, good for you, and inexpensive.
Something you should know about my recipes: they are either extremely precise, or very general ideas of what to do. This Quick Cabbage, an adaption of a recipe from my trusty Joy of Cooking, is the latter, and meets all three criteria!
This recipe yields yummy, slightly sweet cabbage that is tender, and a nice accompaniment to any main dish.
Fill a pot with enough water to cover the cabbage, and set it to boil. *Note: at this time, the cabbage isn't in the pot.
Wash your head of cabbage, and cut off how much you want. A quarter of a head is usually good as a small side for the husband and I. Half a head will leave us with seconds, and possibly left overs.
Cut the cabbage into desired shape and size. I like roughly one inch strips
By now, the water should be rapidly boiling. Plunk your cabbage into the boiling water, and poke at it to ensure every bit gets submerged.
Boil until the color sharpens. Green cabbage will become more vibrant. I've only done this once with red cabbage, and it did take a bit longer than did the green.
Watch the cabbage carefully! This does not take long. I continue to poke at it, to keep things moving and submerged.
When the color has been reached, and the cabbage is firm, yet tender, drain off the water. Toss in about half to a whole tablespoon of butter, and salt and pepper to taste. I often omit the salt and pepper.
Enjoy!
And if you try it, let me know what you think!
Something you should know about my recipes: they are either extremely precise, or very general ideas of what to do. This Quick Cabbage, an adaption of a recipe from my trusty Joy of Cooking, is the latter, and meets all three criteria!
This recipe yields yummy, slightly sweet cabbage that is tender, and a nice accompaniment to any main dish.
Fill a pot with enough water to cover the cabbage, and set it to boil. *Note: at this time, the cabbage isn't in the pot.
Wash your head of cabbage, and cut off how much you want. A quarter of a head is usually good as a small side for the husband and I. Half a head will leave us with seconds, and possibly left overs.
Cut the cabbage into desired shape and size. I like roughly one inch strips
By now, the water should be rapidly boiling. Plunk your cabbage into the boiling water, and poke at it to ensure every bit gets submerged.
Boil until the color sharpens. Green cabbage will become more vibrant. I've only done this once with red cabbage, and it did take a bit longer than did the green.
Watch the cabbage carefully! This does not take long. I continue to poke at it, to keep things moving and submerged.
When the color has been reached, and the cabbage is firm, yet tender, drain off the water. Toss in about half to a whole tablespoon of butter, and salt and pepper to taste. I often omit the salt and pepper.
Enjoy!
And if you try it, let me know what you think!
Subscribe to:
Posts (Atom)