Hello all.
At the beginning of this whole blog thing (way back when in January), I told you that I was doing this to share my attempts at living more frugally. That I'd talk about ways to save money, tips to stretch what you have, or use things you already have around the house in new and creative ways. And now, here I come, talking about wacky things like honey-as-face-wash, grr-US-school-lunches-food-culture, and "I have long hair." You are probably wondering what I'm doing right about now.
Couple of things:
1) Turns out, there is a lot I don't know about saving money, stretching a dollar, and multi-purposing common household items. So, I am trying to learn. But, I don't want to go around preaching what I haven't at least tried. I *know* that you can use baking soda as a household cleaner, to replace shampoo, and even as deodorant. The things is, I haven't actually tried these things out, and don't want to just be a link-fest. Resources are great, wonderful, and helpful, but I want this blog to be more. I want to also provide (yet another) personal story of triumph or frustration, so that someone else can learn from my experiments, and feel a little less scared about trying it.
2) I do feel that living frugally and sustainably or thoughtfully go hand-in-hand. I know that some of the organic (or advertised-sustainable) products have a higher up-front price, but I do feel that they can be worth it, if they are truly free of toxic and carcinogenic chemicals. The way I see it, the more I can reduce my own and my family's exposure and risk, the more peace of mind I'll have, the healthier we'll be, the more potential time we'll have together, and the lower our lifetime health bill will be.
Also, with a lot of things, quality products can last longer. Good, whole wheat bread is more filling than the super cheap, fluffy, over-processed stuff. So you don't need to eat as much at a meal with the former to nourish yourself and be full. A good quality lotion will actually alleviate my dry skin (thanks, Mom) in one go, so I don't have to constantly re-apply or slather on ridiculous amounts. Lesser lotions, even though the same sized bottle may be cheaper, end up costing me more in the end, because my skin just doesn't get hydrated, and I have to keep on re-applying. And, while this example is not from my own experience, I think it illustrates my point well. My mom, and my step mom (as in my dad's second wife) have both noted to me that when they feed their dogs a higher quality (and more expensive) dog food, the dogs eat less, and poo less. In the good dog food, there are fewer fillers, so less is needed to keep the dog nourished and full, and less of what is consumed is unusable and therefore passed.
So, that may not have been the prettiest of images, but think about it. If you are thoughtful about what you actually need and consume, even if there is a higher initial price, you may end up consuming less, thereby saving money in the long run. Not to mention that the good stuff is often better for you. I also recognize that sometimes, in the moment, someone may want to purchase the more expensive, organic product, but simply doesn't have the resources to do so at that time. Been there. I understand. We can only do what we can.
All of this being said, I hope you can understand what I'm trying to do, and that I am only human, with constraints. I still have a lot of my own laziness to overcome, and waste in my life. I have a long way to go. I'd be honored if you'd stick around for the ride.
Showing posts with label Information Post. Show all posts
Showing posts with label Information Post. Show all posts
Monday, March 29, 2010
Wednesday, March 24, 2010
Hair today
Here's something you should know about me. I like my hair. I have long hair. (I believe it qualifies as iliac length, which means the ends reach the top of my pelvic bone in the back.) I like having long hair. I do not have any plans to cut it all off in the future. Also, aside from curling it (with overnight sponger rollers) for my wedding, and then again for a school project (that time with hot rollers), I haven't used a heat appliance on my hair since... December-ish of 2004.
I'm a bit obsessive about my hair and what products do or do not go on my head. There are ingredients I avoid, such as sodium laurel/laureth sulfate, and silicone and it's derivatives.
I even have my own pair of hair scissors that I use to dust, or snip off split ends when I see them. (Did you know that if you use the same scissors for paper and your hair, unless you sharpen the blades before using them on your hair, you are really just damaging your ends? It's like my mom having dedicated sewing scissors.)
Sounds like a lot of work, huh? Not really. I shower at night, and let it dry overnight. If it isn't dry in the morning, not a big deal, letting it down from the hair-turbin-towel (like this) helps. In the winter, a scarf can go over it to protect it from the cold.
I brush it with a wooden brush or comb. I wear it simply, often in a ponytail, braid or bun. If I want to fancy it up, I can do more elaborate buns, like a Chinese braided bun or an infinity bun.
I don't spend tons of time or money on frequent trims or styling sessions. I don't get it colored, highlighted or low-lighted. (I do like using henna to color my hair. I've only done it once so far, but liked the result.) I don't spend the time, money or effort to ensure a specific coif every morning.
For me, it is easier. When I had shorter hair (chin length-short), if I didn't wash it in the morning, then dry it, and curl the ends under, I ended up with weird-all-over-the-place hair that looked very unkempt.
I'm telling you all of this because I want to talk about various hair-related things later on in my blog, and I want you to know where I'm coming from on the issues. (yeah, hair-issues. With all the things going on in the world, there are more important things than hair, but here we are.)
I've mentioned quite a few things here without linking to more information. I hope to expound on my choices later on, and think that for a lot of these choices, I can ramble on at length. Quite frankly, I don't want to bore you.
What do you think about hair? Imagining me to be a crazy person right about now? Do you even care to learn about hair care and that you can't actually repair damaged hair?
Wednesday, March 10, 2010
Adventures in Couponing!
On a recent grocery shopping trip, my husband and I tried to stick to our list and use coupons whenever possible. (The list was the general, "what do we need/use" list. I haven't quite graduated to full-week menu planning yet.)
This took a bit more planning than usual for our trip. Originally, we were thinking about going grocery shopping on Saturday, since we wouldn't have been to work in the morning. But, he suggested we wait till Sunday, and see what coupons we could use from the paper that day. This meant that we would have to go get a paper on Sunday morning.
So, between laundry, coupon-clipping, and actually enjoying time together, shopping got put off. We are lucky in that we are not about to starve by delaying a shopping trip by a day or two.
We opted to go to the Kroger near us, and set off! Even though we've lived here for close to a year now, between going to different stores and admittedly less than organized shopping trips before, I am still learning the layout of this Kroger, which did lead to some backtracking and scrambling to look for coupons. After doing this a couple of times, I stood off to the side of a main aisle, mouth open and squinting at the directional signs, putting the relevant coupons in order as best I could, saving produce/frozen/dairy for the end. (Yeah, I know this goes against the "shop the perimeter of the store for whole food/cheaper foods" method, but it is what it is).
Having the coupons in this order did make the rest of the trip go more smoothly. A coupon wallet or organizer of some kind would be very helpful in keeping track of the coupons by brand, product type, expiration date, or whatever organizational method you find convenient. I just had an envelope full of the things. I do know that within the last year or so, my mom gave me a coupon wallet, but I can't find it. I blame moving.
We moved through the store slowly, and all told, ended up spending an hour and a half in the store. That doesn't really bother me, but that amount of time in a grocery store is not my husband's idea of time-well-spent. Hopefully, as we get into the swing of this couponing thing (if it should stick), we'll get more efficient, too!
This shopping trip was a fairly routine weekly type of trip, with other things, like soap, medicine and TP, thrown in. In fact, this trip would probably suffice for 1.5-2 weeks, all things considered.
Even if we had a coupon for something, we didn't just blindly grab that item. We still shopped the store. Were we sticklers for that brand? What are the stipulations for that coupon (did we have to buy 2 to get the savings)? Did the coupon make the unit price lower than the store brand or another brand? All of this resulted in more than a few coupons being relegated to my back pocket, possibly to be used at a later date.
In total, we saved about 30% of our total bill (according to the handy little calculations at the bottom of our receipt). It was not all straight coupons. We used our Kroger Plus Card, which yielded by far the bulk of our savings - about three quarters of that 30% was thanks to the store club card. Kroger also doubles manufacturer's coupons, up to $1. So, any coupon that we had an used, that was less than $0.50, got doubled. This is, honestly, something that I forgot to take into consideration as we were shopping.
A few things that were on the list didn't make it into the cart, b/c they were more general, "it'd be nice to have X on hand" and not necessary items.
All in all, I think that it was a successful shopping trip, and a successful foray into the world of couponing. We both have a better idea of what is actually involved, and how we can work to make the coupons work for us.
I see coupons in our future!
Thursday, February 25, 2010
Expiration dates
As I said recently, I think of expiration dates as general guidelines for when I should use food, and then, how I should prepare it. My husband, on the other hand, is more likely to follow those dates.
On Monday, I linked to an article from Slate.com about how, well, I was right, and that food is generally safe for consumption past those little stamped dates. I also emailed it to my husband. He responded with this article about using expired foods to save money may not be worth the cost of gastronomical distress.
I thought that I should share it with you, as well. You know, present the other side of the argument and all. It's true, though. I wouldn't want to risk my health to save a few bucks, because in the long run, illness would end up costing more.
I do want to highlight a small portion of the article he sent me:
Sniff tests, as well as checking for any color changes, are usually good indicators of a food's safeness.
Many expiration dates are not symbolic of when the food actually expires, but simply a date that indicates how long before the food's characteristics change. They are also used as a suggestion of "best when used by" dates, or "sell by" dates for grocery stores. -Ashley Holstrom
Felt nice to see that in print. I am a big fan of the sniff test. A caution, though, sniff and sight tests are not fool-proof, and if you are uneasy about eating something, don't.
Here's an interesting site that will tell you how safe something is to consume after the stated expiration date.
Wednesday, February 10, 2010
Taking Stock, part deux
I hope you enjoy the titles of my posts as much as I do. They are chosen because they make me smirk; really hope you get a smile or two out of this blog.
On to the chicken carcass that was chillin' in my fridge on Saturday.
There are actual stock recipes. If you google stock, or check out your favorite how-to cookbook (mine being my old Joy of Cooking), you are bound to find several. They usually call for vegetable scraps or fresh veggies or a bouquet garni of some sort to help flavor the stock. They'll call for a specific amount of bone/carcass to water/veggies. The first time I attempted stock, I found this very helpful. But here's the thing, people have been drawing nutrients for stock for a long time, and did so without recipes.
Basically, what I've taken from the recipes is :
- older chickens tend to have more flavor
- the carcass needs to be completely covered (with usually an inch or so to spare) with water
- veggies can be used to flavor
- you do need to bring it to a boil
- you need to simmer for at least an hour or two
- lid should be set on the pot, slightly ajar, for majority of simmering time
- and skimming the scum is very helpful.
What this means is that my process for stock making is generally:
- place carcass in stock and cover with water
- set to boil
- let boil for a while, check on it
- reduce heat to simmer
- set lid on pot, slightly ajar
- check on it
- go away, read a book, watch some tv
- check on it
- skim the stock
- repeat
When the liquid has reduced (and if I don't feel like adding more), and has gained a color resembling stock, I remove it from the stove. Then, I take out the bones (and anything that was added, like onion or bouquet garni), and divide the stock amongst my storage containers. Washed pasta sauce jars work very nicely. Let it all cool on the counter, and then stick in your fridge. Be sure to rotate any stock still in your fridge to the "top," or where ever you will be able to use it before the new stock.
Because I generally don't add veggies to my stock as it simmers (because I don't often have them on hand), in all honesty, my stock is rather bland. I can see the fat in it, though, and it is more flavorful than plain water.
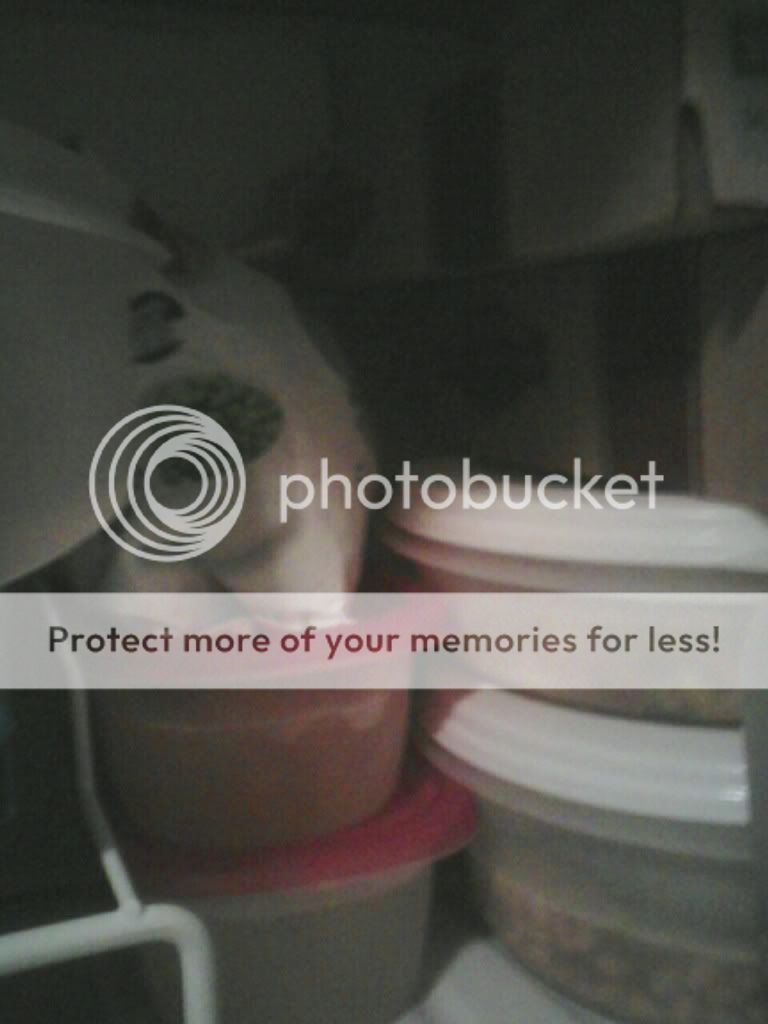
In case you are curious at all, here are some photos of my freezer:
1. See the tower of stock containers, a bag of frozen veggies, and to the right, the larger containers of soup
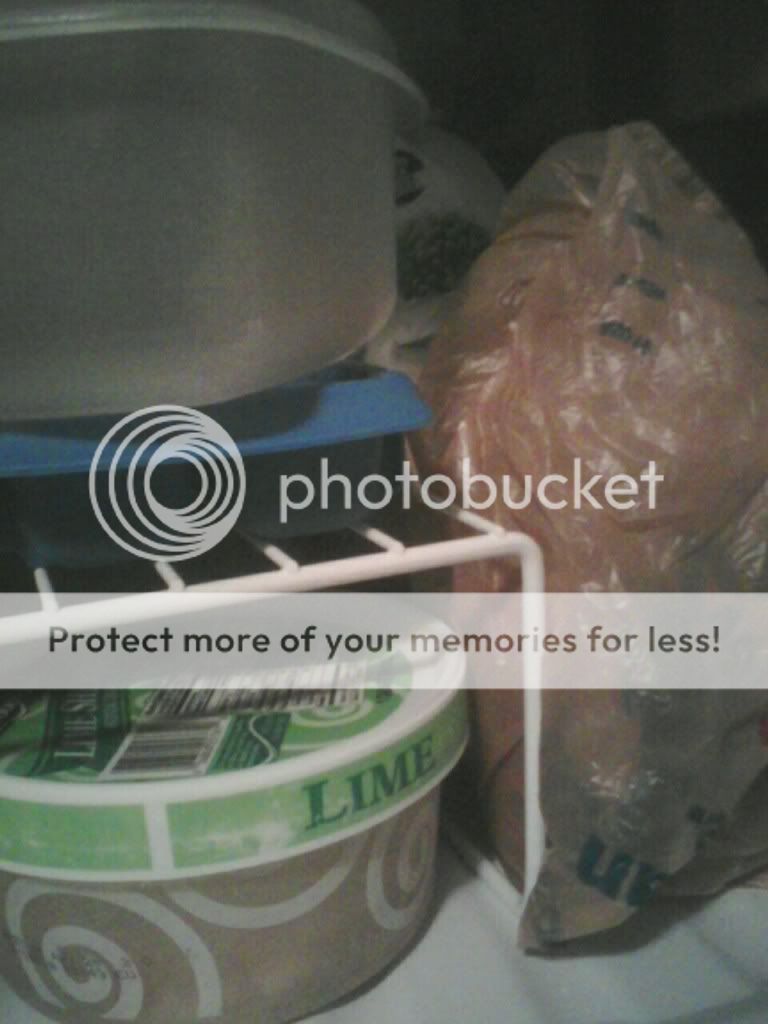
2. The plastic bag is wrapped around an old pasta sauce jar of new stock, as a precaution, in reality, this is sitting in front of the tower of stock. The lime sherbert container is actually soup. You can also see my ice trays and DIY ice bucket.
Making your own stock is a relatively easy process that requires very little attention on your part, once the pot is simmering. Have you made your own stock before? Do you do it on a regular basis? If so, do you follow a recipe or add flavoring to it? If not, feel like giving it a go?
On to the chicken carcass that was chillin' in my fridge on Saturday.
There are actual stock recipes. If you google stock, or check out your favorite how-to cookbook (mine being my old Joy of Cooking), you are bound to find several. They usually call for vegetable scraps or fresh veggies or a bouquet garni of some sort to help flavor the stock. They'll call for a specific amount of bone/carcass to water/veggies. The first time I attempted stock, I found this very helpful. But here's the thing, people have been drawing nutrients for stock for a long time, and did so without recipes.
Basically, what I've taken from the recipes is :
- older chickens tend to have more flavor
- the carcass needs to be completely covered (with usually an inch or so to spare) with water
- veggies can be used to flavor
- you do need to bring it to a boil
- you need to simmer for at least an hour or two
- lid should be set on the pot, slightly ajar, for majority of simmering time
- and skimming the scum is very helpful.
What this means is that my process for stock making is generally:
- place carcass in stock and cover with water
- set to boil
- let boil for a while, check on it
- reduce heat to simmer
- set lid on pot, slightly ajar
- check on it
- go away, read a book, watch some tv
- check on it
- skim the stock
- repeat
When the liquid has reduced (and if I don't feel like adding more), and has gained a color resembling stock, I remove it from the stove. Then, I take out the bones (and anything that was added, like onion or bouquet garni), and divide the stock amongst my storage containers. Washed pasta sauce jars work very nicely. Let it all cool on the counter, and then stick in your fridge. Be sure to rotate any stock still in your fridge to the "top," or where ever you will be able to use it before the new stock.
Because I generally don't add veggies to my stock as it simmers (because I don't often have them on hand), in all honesty, my stock is rather bland. I can see the fat in it, though, and it is more flavorful than plain water.
In case you are curious at all, here are some photos of my freezer:
1. See the tower of stock containers, a bag of frozen veggies, and to the right, the larger containers of soup
2. The plastic bag is wrapped around an old pasta sauce jar of new stock, as a precaution, in reality, this is sitting in front of the tower of stock. The lime sherbert container is actually soup. You can also see my ice trays and DIY ice bucket.
Making your own stock is a relatively easy process that requires very little attention on your part, once the pot is simmering. Have you made your own stock before? Do you do it on a regular basis? If so, do you follow a recipe or add flavoring to it? If not, feel like giving it a go?
Tuesday, February 9, 2010
Taking stock (and giblets, necks, and carcasses)
So that chicken whose giblets I decided I didn't like, what did I do with it?
Here's the run down. Bought the whole chicken on Friday, and baked it that night. (350 degrees Fahrenheit, for 20 minutes a pound, uncovered, on a wire rack in a shallow baking pan. Or until a meat thermometer stuck in the thigh reads 180.)
**Here's an aside about the chicken. I could have bought one of those pre-roasted chickens from the store, and saved myself some time, while still having a bunch of meat and the carcass to use. Why didn't I? Because those are about 2 pound birds, and I paid 56 cents less for a bird that was roughly 4.7 pound. Plus, I got the giblets and neck in addition to the meat and carcass. The pre-roasted chickens aren't a bad deal overall, but if you have the time to spare, cooking a whole chicken yourself is usually more cost-effective.**
As the chicken was in the oven, that is when I started the failed giblet recipe and also set the neck to boiling.
Did you just do a double take? Yeah, well, I took my medium sized sauce pan, filled about half way with water, plunked the neck into it, plus the last quarter of an onion I had laying around. Brought it all to a boil, then reduced to a simmer, and let it alone. I did poke my head over every so often to skim off the scum/fat/foam that forms. I don't remember how long I ended up letting it simmer, but it was probably at least 1.5 to 2 hours. At this point, I discarded the onion and neck, and poured the liquid into a jar.
Yes, a jar. I am running out of inherited and re-purposed plastic storage containers (they are all in my freezer!). I've used the jars to make freezer jam, so they hold up in the freezer, and contain a known quantity (now, if only I could remember what that was). You can see the jar of neck stock here, sort of, along with a beef chuck roast that my aunt gave us, some nuts, and other random stuff on my freezer door.
After the chicken cooled, I carved it up, as best I could. This is not a skill at which I excel. I tried to slice the breasts thin enough for sandwiches, and disjointed the legs and wings. I was quite pleased with the result, because the chicken was tender, sliding right off of the thigh bone. Aside from the bone-in wings and legs, and the sliced breast, everything else was just sort of peeled and pulled off, and stored together.
I put the carcass in my big soup pot, covered it, and stuck it in the fridge. This was all done Friday after I got home from work, mind you. It was getting late, and I wanted to read, spend time with my husband, and oh yeah, sleep! The carcass would keep for a day.
So will the actual stock-taking.
Friday, February 5, 2010
A Game of Grocery Store Pick-Up
Recently, I had to make a quick run to the grocery store on my way home from work. I wanted to try a soup recipe for dinner that night (more on that later), and needed an onion. The recipe also called for smoked ham and a ham hock, which I didn’t have and didn’t want because neither of us are big fans, so… I ixnayed the ham and the hock.
Pondering the recipe further, because this is how I spend my down time, I considered replacing the flavor and fat the ixnayed ingredients would have lend the soup with bacon.
I also needed to get some vitamin E oil, to treat my poor, burned hand.
And, then, I also figured I would need to pick up some drinks for my husband. That is simply a part of most grocery runs for our little family. (Yes, I know that these are not the most economical or ecological choice, but we buy what he will drink.)
So, my list was, roughly in order of priority: onion, vitamin E oil, drinks, and bacon. I also knew that I had to keep the cost under ten dollars. This is not an impossible task, and if not for the vitamin E oil, probably could have been done for closer to five dollars. But, alas, I put the health of our skin high on the list of things that are important.
Into the Marsh I went. Why Marsh, because it is literally on the way home. No turning onto a side street, no minor detour, nothing. It is on Third Street, as I drive home. In general, I’ve noticed that Marsh and Kroger tend to have similar sale prices. The advantages Kroger has over Marsh are: larger store (by me), more store- brand items (more items at lower cost), a bulk section, and a massive wine/liquor section (gotta love Indiana). Advantages of Marsh over Kroger: literally on the way home, $20 meat variety packs, and occasionally, they have better sale prices.
I made a bee-line for the pharmacy section, to case the joint for vitamin E oil. I saw two brands of capsules and one bottle of straight oil. All of the choices, no matter the quantity, were pretty much going to blow my chances of buying the vitamin E and onion. I was crushed.
Deciding that the onion was more important this trip, I left the pharmacy section, questioning my choice of store. I made my way to the produce section, by way of the breakfast meats. A quick survey of the bacons told me that if I wanted something that wasn’t completely chemical-laden, I was going to be paying at least $2.50 for a package. Not a bad price over all, but bacon was last on my list, so the first thing to get cut. I made a mental note, and went on to the onions.
It was about $1.30 per pound for loose onions (I know!), while the three pound bags were about $2.50. The loose onions were larger than the bagged onions, but at $1.30 per pound, they were more expensive per unit than the bagged onions. Also, larger wasn’t necessarily better for me. I can always cut up two onions instead of one. Leftover onion, unfortunately, tends to go bad before it is used or frozen. (This is something that I am working to remedy.)
Bagged onions it was. Now, I had about $7 to spend on the rest of my list. I went back to the pharmacy section, to peruse my choices once more. (All of this back and forth/shopping the store is why I don’t like shopping with my husband, and why he is exasperated by shopping with me.)
And that’s when I saw it. A display of a supplement brand that had not been on the shelves where I was looking before. They were on sale. I got a bottle of capsules (40, I believe) for about $3.50. Score!
At this point, I rethought the bacon entirely. The previous night, I did have the foresight to pull some ground beef down from the freezer, so I knew that I did have some meat to add to the soup, and that I could count on some fat from there for flavor. Considering my list and my budget, I decided that bacon was not necessary.
Resolved to my choices, I had about $3.50 to spend on drinks. Well, less than that, considering taxes. And ever since I left Kentucky, I’ve never been sure of the food tax rate. I think North Carolina had a weird, graduated system that depended on the type of food, and level of preparedness. As a result, I try to leave a substantial cushion for “The Attack of the Tax!”
The next item, drinks, is where I regret my choice of Marsh over Kroger. My location doesn’t have store brand soda. Unless Faygo is store brand. I just can’t stand spending $1.25 on a 2-liter of soda. Especially when that is the sale price. Curses.
I sped-walked past the sodas, and headed towards the bottles of Lipton Green Tea (Yes, I know that there are tons of additives and such in these, but this is for my husband, not me. He likes it. And, well, it is preferable to tons of soda.) In my speediness, though, I almost sped right past an actual sale on the 2-liters. 68 cents for a 2-liter of Faygo. I almost did a happy dance in the middle of the aisle. I got the lemon-lime. No caffeine.
All in all, I ended up spending about eight and a half dollars. Not my best shopping trip, but not my worst, either. The soup may have been tastier with bacon, but it was still yummy. The Faygo was happily drunk. And I’ve been able to use one capsule of vitamin E oil multiple times. Plus, I have onions ready for when I need them.
How do you think I did? Would you have made different choices? Do you have any particularly gratifying grocery store stories?
Wednesday, February 3, 2010
Iron: 1 Emily: 0 A Minor Medical Post
**I am not a doctor, nor do I have any medical training at all. Please use common sense, and do not hesitate to seek medical treatment.**
I have long hated ironing. It always felt like...well, such a chore. My solution? Quite simple: avoid. I don't iron.
Never took an iron to college. Didn't register for one for my wedding. May have inherited an abandoned one from a roommate, but that quickly got shoved to the back of a closet, and eventually made it either to the dumpster (for shame, Emily!) or Goodwill (that's more like it).
To keep from sending either myself or my husband out of the house looking like a wrinkled mess, I was simply vigilant about removing clothes from the dryer promptly (a good thing to do when working with laundromats), and carefully shaking out/folding any should-be-ironed clothes. The seams of pant legs got quickly matched up, and smoothly folded, while button-down shirts were pulled from the pile before the crush of t-shirts and jeans could cause permanent wrinkles. After carefully hanging these clothes, I simply let gravity, and the weight of the rest of the closet take care of the rest.
For our clothes, this has been working well enough. But, it won't do for quilting.
As you may know, I've recently started my first full quilt. This requires a lot of measuring, cutting and piecing together of fabric, and in order to do this correctly, so that everything will match up in the end, the cloth needs to be washed, dried, and ironed before a single measure is taken or line drawn.
I needed an iron. *sigh... I tried to avoid this, but broke down, and got one. Also got a small, table-top ironing board, that is perfect for craft-ironing, but not for "real" ironing. I found this out the hard way.
In an attempt to iron my first shirt in years (promise that I know how to do it), I managed to maneuver the iron and myself so that I grazed the iron with my hand. There was a small flash of pain, just enough for me to realize what was happening, but not much. So, because of the apparent lack of searing, lingering pain or any visible damage, I simply continued on. Probably should not have done that.
I did wash my hands, and try jojoba oil on the burn, followed by my normal oatmeal-lotion. I used jojoba oil because that is what I had, but should have used vitamin E oil. I use an oatmeal-based lotion, like Aveeno, because I inherited dry skin from my mom.
So, here's the burn. According to the Mayo Clinic, it is probably a second degree burn, because of the lone, solitary blister. Also according to them, I should have immediately cooled the burn by running it under or immersing it in cool water, instead of continuing to iron. Next, I should have covered it with a sterile, lint-free bandage, such as gauze, instead of leaving it completely exposed. The Mayo Clinic site also lists some things not to do, like use butter.
The Mayo Clinic did not specifically say to put on any creams or antibiotic ointments, but they do make burn ointment for a reason. A previously listed link includes vitamin E oil as an option for soothing minor burns and helping skin heal.
So, why vitamin E oil over a burn ointment? Well, because vitamin E oil is multi-purpose. It can be used as a body and face moisturizer alone, or even in conjunction with other lotions. It can be used to help reduce the appearance of scars and wrinkles. It can even be used in hair-care products. Since vitamin E oil has many purposes, using it means that you can reduce the number of other products you buy.
It should be noted that the burn I sustained was minor. It was no more than an inch long, and scarcely a quarter of an inch wide. Regardless of the severity, my attitude toward the burn was really quite negligent, and I do stress that if you burn yourself, you should take it seriously, and determine that it is indeed a minor burn before you attempt to care for it yourself. It may be less expensive to slather on vitamin E oil or burn ointment, but in the long run, if the burn is serious, you will save yourself money, pain, and possibly more if you seek immediate medical attention.
Tuesday, February 2, 2010
But Baby, it's cold... inside
I live in southern Indiana. I grew up in Kentucky, and then spent years in Tennessee and Texas. My husband grew up mainly in Georgia, and went with me to Texas. His resistance to cold winters has always been low. Any that I had dissipated when we moved into an apartment in Austin in August.
After years of preferring to have working AC over working heat (a friend of ours did go through at least one winter in Austin without working heat), I find myself on the other side of that coin, with thinner blood. Now, we confront the question of how to stay warm in the winter, and not break the bank.
One way not to break the bank is to embrace the chill, and do things like participate in the Freeze Yer Buns Challenge. (Can you tell I like this woman's blog?) Even the point of that, though, is to reduce your energy consumption, but not actually freeze off any of your buns.
So, how can you stay warm without a ridiculously high energy bill? Some tips I've heard of are:
- relocate within your home. Instead of heating all the rooms, move into the one or two or three that get the most use, and seal off the rest, thereby reducing the square footage you heat. (Haven't done)
- already baking? When you're finished with the oven, leave the door open, and let the residual heat out into your kitchen. If you are thinking about trying this, be very careful. As Cam pointed out, this is dangerous. The thought here is to let any heat escape after turning off the oven, as extra heat. I wouldn't do this for long, on a regular basis, or if I had little ones anywhere in the house. Being chilly and alive in one piece is far better than being toasty and well... toasted. (I have enjoyed the warmth when baking.)
- wear layers. You can put on extra socks, or a sweater to keep yourself warm. Great, until you shower! (Have done, and still do. I have warm, fuzzy socks that are I wear at home to keep the feet warm, as well as an around-the-house sweater.)
- layers on the bed. Multiple bed coverings will help keep you warm at night so you don't have to turn up the thermostat. (Yup, plus, I love having that extra weight of the covers on me, too.)
- even more layers. When you are sitting down to read, watch TV, or do any sedentary activity, throw a blanket over your legs, or wrap an extra sweater around your shoulders. This will help to keep you warm when you aren't moving around. The Snuggie/Slanket concept is, well, not a bad idea. (I don't have either of those, just around the house blankets and sweaters that I snuggle into on the couch.)
- cover the floors. Unless you have heated floors or your ducts underneath the floors, hardwood floors and tiles tend to be on the cooler side. Carpets and area rugs help to insulate the floors, and keep your feel warm. (I love hardwood floors, but understand the value of an area rug! All of my apartments have been carpeted, and I have noticed a chill when walking from the carpeted living room to the tiled kitchen)
- cover the windows/walls. One thing I've learned since moving north of the Ohio River is that you can put plastic over your windows for insulation; it's called shrink wrapping your windows. At work, they had people come up and do that. Heavy drapes on the windows will help block drafts and prevent heat from escaping. And why do you think that people used to hang tapestries on castle walls? Sure, they were pretty, but they also helped reduce echoes, and hold in heat. (We haven't even hung our pictures in our apartment yet, so I haven't done this at home.)
- filling in the gaps. Of course, if you have gaps around window or door seals, then cold air will come in, and warm air will escape. You have a couple of options here. If it is just that air comes in and out under your door, you can buy or make a draft stopper. If there are gaps in the door and window seals, and you rent, let the management company know, and they will do what they do to fix it. If you own, you may need to look into replacing them all together. As a renter, I am not sure how to do that, or what all is involved. Sorry. A temporary fix could be to wrap your windows in plastic, as mentioned above. (We have some draft stoppers that are used sporadically.)
These are just a few things that can be done quickly and at a relatively low cost to you. If you are so inclined, and own your home, you can always look into using solar energy, geothermal energy, wood stoves [but not fireplaces!], radiant heat or other alternate fuels/heating sources to heat your home.
How do these sound to you; anything worth trying? Do you have any tips that I have overlooked?
Monday, February 1, 2010
Water, water, every where, Nor any drop to drink.
That line is taken from The Rime of the Ancient Mariner, which I have not read. One of the many things on my to-do list.
But on to why I chose that as the title of this post. While of the 70% of the earth's surface is covered with water, and only something like 1% is potable.
I'm not even talking about that right now. I'm talking about hot water.
Now, I live in an apartment, with a small water-heater tucked under my kitchen sink. That's a far cry from the large one my parents had, or the behemoth the dorms in college must have had. It also means that running out of hot water happens more often than I care to think.
Last weekend, due to some maintenance that had been done on our sink, we were out of hot water. No showers, no dishes... It was not fun. (Turns out that the maintenance people had simply forgotten to turn something back on.) When the water came back on, I needed a shower, but waited for the tank to fill and heat.
Even after waiting, I was worried that I'd be shocked cold during my final rinse. While a cold water rinse might be good for hair and skin, a surprise like that would not be good for my mood! So, I squeezed soap onto my loofah, and put conditioner in my hair, and turned off the water. Braided the conditioner in, lathered up, and then turned the water back on, all the while thinking about how this would not only save the hot water, but conserve water in general.
Conserving water in general also means that our water bill will be lower.
So, a simple adjustment to my routine, turning off the water when I'm not actually using it will benefit me threefold: 1) ensure that I have enough hot water to meet my needs, (2) cut down my overall water usage, and therefore water bill and (3) help conserve the potable water supplies.
Last night, the unthinkable happened. I ran out of hot water in the middle of my shower. I had not been following my own advice about turning off the water, so I was standing there, conditioner braided and loosely bunned in my hair, and, well, ready to rinse off, with no hot water. So, I turned off the shower.
I tried. I really tried to rinse with cold water, but it was icy, and the ambient temperature of our apartment is around 65 degrees. Not cold, but not all that warm, either, not when you are already chilled.
I rinsed what I could in the cold (like the loofah), and waited.
After a few minutes, I tried the hot water again. Hallelujah! It wasn't as warm as I usually like, but it was warm enough, and I rinsed everything out quick!
During this whole ordeal, I remembered my revelation from the previous weekend, and kicked myself a bit for not listening to myself. But, with an eye ever-forward, I realized that I couldn't change what I had done, but could change what I will do.
So, I'm going to try to employ this water on/water off method more regularly. Will you?
Saturday, January 30, 2010
Jams and Jellies and Marmalade, Oh My!
For most of my [relatively short] life, I've bandied about terms like jam and jelly without discretion. But, thanks to a very informative program on a local access channel [go university town cable!], I have now learned that there are definite differences to these products. And, since I fully plan on tackling various preservation methods, I thought it would be handy to define them!
A few notes to start:
- Things like pectin or a gelling agent of some kind (in more modern methods), and heat-canning tend to be common threads between the actual production of these foods. The differences come into play based on what is actually in the jar.
- As I understand it, the term "preserves" is an over-arching term that includes products like jelly, jam, and conserves.
And now, for the differences:
Jelly - is made from fruit (or vegetable) juice.
Jam - contains crushed or cut up pieces of the fruit (or vegetable), as well as juice.
Marmalade - includes bits of the fruit peel, and is generally used only in reference to preserves made from citrus fruits
Conserves - are whole fruits, stewed in sugar. They can also contain things like nuts.
For a quick breakdown of the different kind of fruit and vegetable preserves, you can always check out the Wikipedia article. If I ever stumble across that local access show again, I will be sure to note the names of the people involved.
Poking around a bit online, I did find this USDA site that seems to be chock full of information (so much so, you may not need me, my Joy of Cooking, relatives, or experiments!).
While this is by no means an exhaustive list of preservation methods for fruits and vegetables, it is a run down of what most people in the US will encounter in their pantry or grocery stores. It may be a while before I actually tackle the heat-canning methods, but for now at least, I know the differences between jelly and jam.
Have you ever canned anything, or have memories of a family member doing it? Care to share?
Subscribe to:
Posts (Atom)